
Table of Contents
- What You’ll Need Before You Start
- Step 1: Clear the Area and Prepare Your Timber Deck
- Step 2: Choose the Best Timber Deck Cleaning Solutions
- Step 3: Pressure Washing Timber Decks Safely
- Step 4: How to Remove Mould from Timber Decking
- Step 5: Rinse, Protect and Maintain Your Deck
- Troubleshooting Damage and Common Mistakes
- When to Call a Professional for Timber Deck Cleaning
- Frequently Asked Questions
Last Updated: September 14, 2026
What You’ll Need Before You Start
Knowing how to clean timber decks without damage comes down to three things: the right tools, the right chemicals, and patience. Most deck damage isn’t caused by cleaning, it’s caused by rushing the job with equipment that’s too aggressive for the wood.
This guide walks through the full process, from clearing the area to sealing the timber once it’s dry.
Here’s your kit:
- Soft-bristled brush on a long handle for general scrubbing
- Stiff wire brush reserved only for stubborn spots on hardwoods, never on soft timber
- Pressure washer with an adjustable nozzle (max 1,200 psi for timber)
- Mild detergent or a pH-neutral timber cleaner
- Oxygen bleach for mould and mildew removal
- Protective gear: gloves, safety glasses, non-slip footwear
- Garden hose for rinsing
- Wood preservative or protective sealant for after cleaning
Avoid alkaline cleaners on tannin-rich timbers like merbau. They strip natural oils and leave the surface looking washed out.
Never mix bleach with ammonia-based cleaners (Chemical burns, first aid and treatment). The resulting gas is toxic, and on timber it can permanently bleach the wood grain.
Step 1: Clear the Area and Prepare Your Timber Deck
Preparation takes fifteen minutes and prevents most accidental damage: scratched boards, stained siding, and dead garden beds.
Remove everything from the deck: furniture, planters, potted plants, doormats. Sweep with a stiff broom, paying attention to the gaps where leaf litter collects and holds moisture against the timber.
Next, protect what surrounds the deck. Wet down nearby plants and garden beds, cover delicate shrubs with a tarp, and run plastic sheeting along the base of walls or fences the runoff might reach. Most cleaning solutions are safe once diluted, but concentrated runoff can scorch foliage.
Check for existing damage before you add water. Loose boards, popped nails, and soft spots from wood rot need fixing first, water will find every gap you leave.
- Remove all furniture and loose items
- Sweep debris from the surface and between boards
- Wet surrounding plants and cover delicate ones
- Check for loose boards and protruding nails
- Note any soft, spongy sections that suggest rot
Step 2: Choose the Best Timber Deck Cleaning Solutions
The best timber deck cleaning solutions are pH-neutral or mildly alkaline, matched to the timber species and soiling. A general-purpose deck wash handles grey, weathered timber; oxygen bleach handles mould and mildew; oxalic acid handles tannin stains and rust marks.
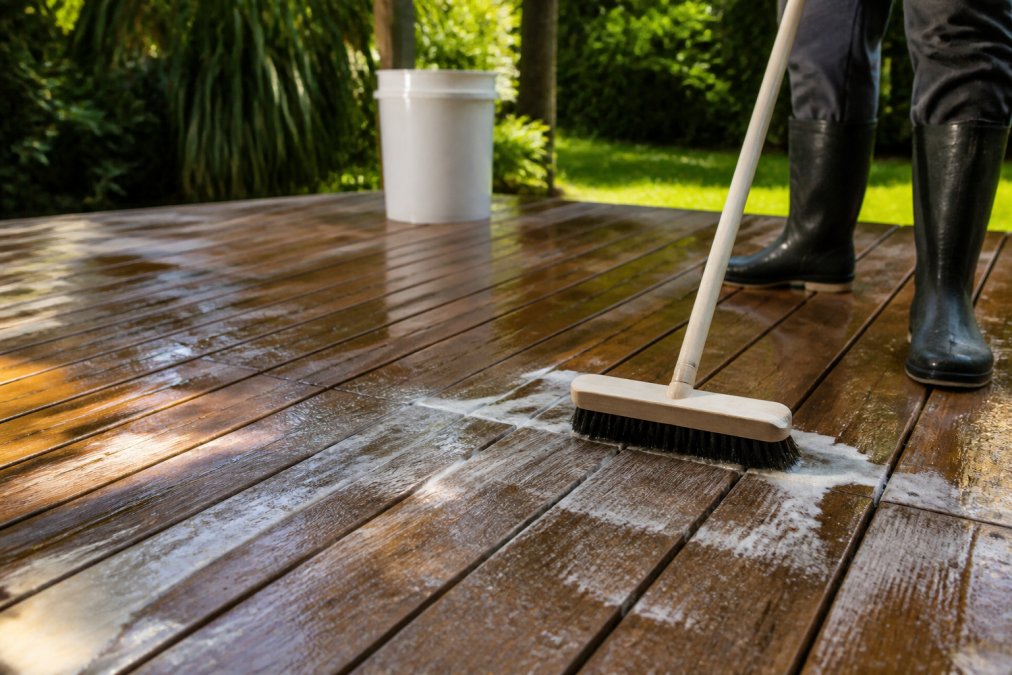
For routine cleaning, mix mild detergent with warm water per the label. Apply with a soft-bristled brush or pump sprayer, working in sections so it doesn’t dry. Let it sit five to ten minutes, then scrub along the grain, not across it.
Scrubbing across the grain raises wood fibers and leaves a permanently fuzzy surface. Always follow the direction of the grain.
Eco-Friendly and Non-Toxic Alternatives
For households with pets, kids, or edible gardens, oxygen-based cleaners and plant-derived surfactants work without harsh residues and won’t harm soil once diluted. Vinegar and water handles light grime but not established mildew. Whatever you use, rinse thoroughly.
Test any solution on an inconspicuous board first, then wait 24 hours. Some timbers react to cleaners by darkening or lightening, and you want that surprise on a hidden board, not the middle of the deck.
Step 3: Pressure Washing Timber Decks Safely
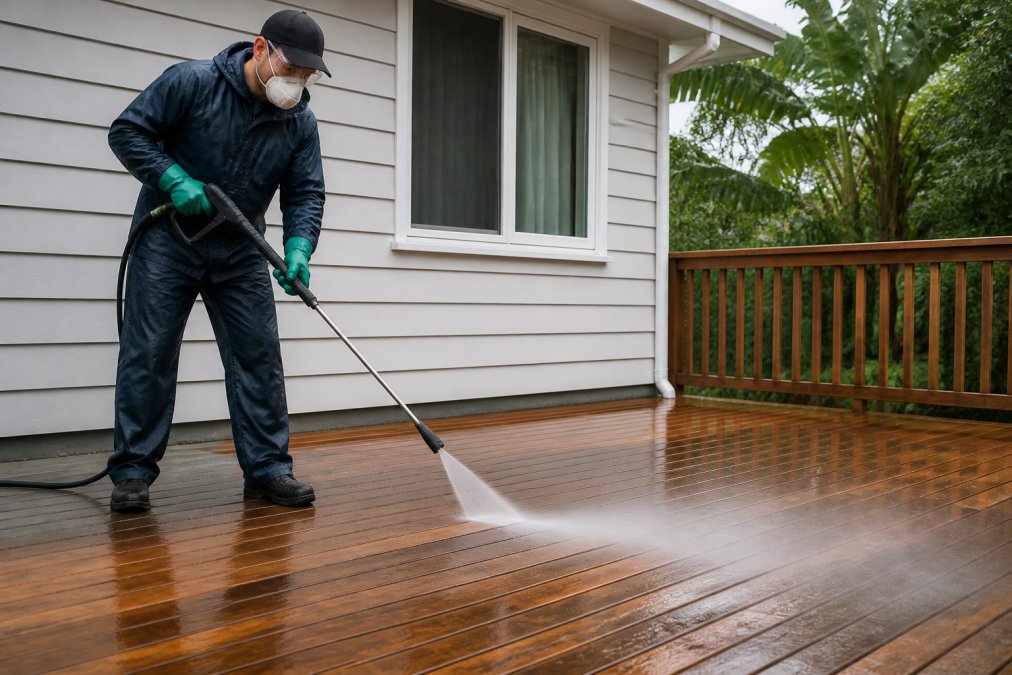
Pressure washing timber decks safely means keeping the nozzle moving, holding it at least 30 centimetres from the surface, and using the widest fan setting available (worksafe.qld.gov.au). Timber is soft compared to concrete, the pressure that strips a driveway will carve grooves into a deck board in seconds.
Set Up the Machine Correctly
Before you pull the trigger, dial in three settings:
- Pressure: aim for 800-1,200 psi. Many consumer machines run 2,000-3,000 psi, so fit a pressure-regulating tip or use the lowest setting. If your machine has no adjustment, do not use it on timber.
- Nozzle: fit a 25-degree (green) or 40-degree (white) fan tip. Never use a 0-degree (red) pinpoint tip on timber, it concentrates the stream into a cutting jet.
- Distance: hold the wand 30-40 centimetres from the surface and keep it there. Closing the gap multiplies the impact force without changing the machine’s reading.
Technique That Prevents Damage
Work in overlapping passes along the grain at a steady walking pace, tip angled slightly downward so spray pushes debris off rather than into the board. Never hold the wand still, even a second of dwell time can etch a visible mark.
Avoid aiming at the gaps between boards, water forced underneath feeds rot and rusts fixings. Clean between boards with a stiff brush or a hose at low pressure instead.
What Goes Wrong and Why
| Damage | Cause | Fix |
|---|---|---|
| Furring (raised, fuzzy fibres) | Nozzle too close, or fan too narrow | Let dry, sand lightly along the grain with 80-120 grit |
| Grooving or scoring | Pinpoint tip or stationary wand | Light scoring can be sanded; deep grooves mean replacing the board |
| Stripped finish | Pressure too high for the coating | Re-sand and re-coat; the old finish is gone |
| Water staining | Spray driven into gaps or end grain | Let dry fully, then treat with a wood preservative |
Power Washing vs Manual Scrubbing
Power washing wins on speed for large, flat surfaces; manual scrubbing wins on control for aged, thin, or soft timber.
| Method | Best For | Risk | Time |
|---|---|---|---|
| Pressure washer (low psi) | Large decks, weathered grey boards | Surface damage if too close | Fast |
| Manual scrubbing | Soft timber, aged boards, detailed areas | Elbow grease required | Slow |
| Combination | Most residential decks | Needs careful technique | Moderate |
For a deck that’s structurally sound, a low-pressure wash followed by a targeted hand scrub on stubborn patches gives the best result. For old, brittle boards, skip the machine entirely and use a soft-bristled brush.
Test your pressure and distance on a spare board or an inconspicuous corner first. Run one pass, let it dry, and check for furring before you commit to the whole deck.
Step 4: How to Remove Mould from Timber Decking
Mould removal on timber decking starts with oxygen bleach, not chlorine (Mould). Mix per the label, apply, and let it sit fifteen to twenty minutes before scrubbing with a soft brush. Chlorine works faster but bleaches the timber and leaves residue that affects the next coat of sealant.
Mildew and mould thrive in shaded, damp sections. Treat the whole surface, not just visible black spots, spores spread beyond what you can see.
Rinse thoroughly afterward and let the timber dry completely before sealing. In humid conditions, that can take two to three days.
Wood Species-Specific Cleaning
Different timbers need different handling. Merbau and ironbark are dense and tolerate firmer scrubbing. Treated pine and cedar are softer and demand a gentler touch.
- Merbau: high tannin content, so avoid alkaline cleaners that draw out the colour. Use pH-neutral products.
- Treated pine: prone to raised grain, so scrub lightly along the grain and keep pressure low.
- Cedar: naturally rot-resistant but soft. Use oxygen bleach and a soft brush only.
- Ironbark and spotted gum: dense hardwoods that handle stiff brushes and moderate pressure.
Match your cleaning method to the timber species before you start. A treatment that’s safe for ironbark can permanently mark cedar.
Step 5: Rinse, Protect and Maintain Your Deck
Rinsing matters as much as the cleaning. Leftover detergent stops sealant bonding and attracts new dirt. Rinse the entire deck top-down with clean water until runoff runs clear.
Let the timber dry at least 48 hours in good weather, bone dry before you apply anything. Most sealants specify a maximum moisture content around 12-15%. Without a meter, tape clear plastic to the deck overnight; condensation underneath means it’s still too wet.
Match the Finish to the Timber Species
The right protective finish depends on the wood:
- Merbau and other tannin-rich hardwoods: use a penetrating oil or a pH-neutral water-based sealer. Avoid high-alkaline finishes that draw out tannins and leave a patchy, bleached look. Expect some tannin bleed for the first few weeks, it’s normal, not damage.
- Treated pine: takes water-based stains and sealers well. Because it’s prone to raised grain, sand lightly between coats with fine grit and wipe off the dust before recoating.
- Cedar: soft and dimensionally stable, but sensitive to harsh chemicals. Use a breathable oil or a clear water-based finish. Avoid film-forming polyurethane, which traps moisture and peels.
- Ironbark and spotted gum: dense and oily. These take longer to dry and absorb less finish, so apply thin coats and allow extra curing time between them.
A Maintenance Schedule That Prevents Damage
Sealing isn’t a one-off. A simple routine keeps the deck sound and makes each clean easier:
- Every 2-4 weeks: sweep or blow debris off the surface and out of the gaps. Leaf litter holds moisture against the timber.
- Every 3-6 months: wash with a pH-neutral cleaner and a soft brush. This removes surface grime before it works into the grain.
- Every 12-24 months: reapply the protective finish. Sun-exposed decks and high-traffic areas may need it annually; shaded, sheltered decks can stretch to two years.
- After any spill: blot, don’t scrub. Oil, wine, and pet accidents set faster when rubbed in.
Fixing Damage You’ve Already Caused
If a previous clean left the deck looking worse, most problems are reversible:
- Furring or raised grain: let the deck dry completely, then sand along the grain with 80-120 grit, progressing to 120-150 grit for a smooth finish. Vacuum the dust and re-seal.
- Grey, washed-out boards: this is usually chemical stripping of natural oils, not structural damage. A pH-neutral wash followed by an oil-based preservative restores colour over a few weeks.
- White residue: dried detergent or hard-water minerals. Re-wet and rinse again, or use a diluted vinegar solution for mineral deposits.
- Black spots that return: mould spores in the grain, not just on the surface. Treat with oxygen bleach, let it dwell, and ensure the deck dries fully before sealing. Persistent recurrence usually points to poor drainage or shade, trim vegetation and improve airflow.
Prevention beats repair. A pH-neutral wash, the right finish for your species, and a simple seasonal routine will keep a timber deck sound for decades, and make every future clean a low-risk job.
Troubleshooting Damage and Common Mistakes
Most deck damage from cleaning is fixable, but prevention is cheaper. Here’s what goes wrong and how to handle it.
Fuzzy or raised grain happens when you scrub across the grain or use too much water pressure. Let the deck dry, then sand lightly along the grain with fine-grit paper.
Grooved or scored boards come from holding a pressure washer too close. Light scoring can be sanded out. Deep grooves usually mean replacing the board.
Discolouration is often chemical, not structural. Alkaline cleaners strip natural oils and leave timber grey. A pH-neutral wash and a fresh coat of oil-based preservative usually restores the colour.
White residue after drying means you didn’t rinse thoroughly. Re-wet the deck and rinse again.
Soft, spongy patches indicate wood rot, not surface damage. Cleaning won’t fix rot. Those boards need replacing before any further treatment.
If you notice soft spots or crumbling timber near the joists, stop cleaning and inspect for structural rot. Water damage underneath a deck is a safety issue, not a cosmetic one.
When to Call a Professional for Timber Deck Cleaning
Some decks are better left to a trade-licensed team. If your deck has delicate timber, existing rot, or an unfamiliar finish, the cost of a mistake outweighs the DIY savings.
Call a professional when:
- The deck is cedar, merbau, or another species sensitive to chemicals
- You spot soft spots, sagging, or loose boards
- The deck sits above a lower level or has complex railings
- You need it cleaned and sealed before a sale or inspection
- Mould keeps returning despite repeated cleaning
A trade-licensed team brings the equipment and judgment to match pressure and chemicals to your timber, the difference between knowing how to clean timber decks without damage and causing it.
Frequently Asked Questions
What is the safest way to clean a timber deck?
The safest method uses a soft-bristled brush, mild detergent and low pressure. Start by clearing debris, apply a pH-neutral or oxygen-based cleaner, scrub along the wood grain, then rinse thoroughly. Avoid stiff wire brushes and high-pressure settings above 100 bar, which strip natural oils and open wood fibers to moisture and rot. For stubborn mould, use a diluted bleach solution (1 part bleach to 4 parts water) and rinse nearby plants before and after.
Can I use a pressure washer on timber decking without causing damage?
Yes, if you follow safe pressure washing timber decks practices. Use a fan-tip nozzle at 25 to 40 degrees, keep the wand at least 30 centimetres from the surface, and never hold it in one spot. Pressure above 100 bar can gouge softwoods and raise wood grain. For older or weathered decks, manual scrubbing with a soft-bristled brush is safer. If you are unsure, a professional can assess your deck’s condition first.
How do I remove mould from timber decking without harsh chemicals?
Mix 1 cup of white vinegar with 4 litres of water, or use a commercial oxygen-based cleaner. Apply to the affected area, let it sit for 15 to 20 minutes, then scrub with a soft-bristled brush along the wood grain and rinse thoroughly. For persistent black mould, a diluted bleach solution (1:4 ratio) works, but protect surrounding plants with plastic sheeting and rinse surfaces afterwards. Always test on a small hidden area first.
How often should I clean my timber deck to prevent long-term damage?
Clean your timber deck every 6 to 12 months, depending on exposure to weather, trees and foot traffic. Decks under trees or in shaded, damp areas may need cleaning every 4 to 6 months to prevent mould and mildew. Reapply a protective sealant or wood preservative every 12 to 18 months. Regular cleaning removes debris that traps moisture, which is the leading cause of wood rot and surface damage.
Cleaning a timber deck without damage is a test of restraint more than effort. The tools are simple. The technique is what protects the wood. If you’d rather hand the job to people who clean timber decks every week, Sydney Pressure Washing Service uses biodegradable solutions and soft washing techniques suited to delicate timber, with trade-licensed operators who know which species can take pressure and which can’t. Get a free quote and protect the deck you already have.
